4.2 How to Develop Connectivity
In the previous chapter, you learned the core OLIVE building blocks hands-on: datapoints, connectors, authentication, and how they interact.
In this chapter, we shift from learning individual concepts to systematically develop connectivity.
Example Scenario
In this chapter, you will learn how to develop connectivity using a practical example. The scenario focuses on integrating a video conference collaboration tool — Microsoft Teams — with ADONIS to enable automatic model generation.
This example demonstrates the full workflow of designing and implementing connectivity in OLIVE, from identifying opportunities to operationalizing a working solution.
What We Learn
Through this example, you will learn:
- A methodology for creating connectivity in OLIVE
- How to identify possible connectable elements
- How to select the appropriate OLIVE concepts for your use case
- How to model and extend your connectivity scenario
- How to operationalize the connectivity and make it usable in practice
Methodology for Developing Connectivity in OLIVE
When developing connectivity in OLIVE, we follow a guiding framework of five phases. Each phase comes with a key question that helps clarify the approach. Together, these questions form the roadmap for building any connectivity scenario.
The Five Phases
- Sketch the idea
Key question: What do you want to do?
This phase is about defining the purpose of your connectivity — the problem you want to solve or the outcome you want to achieve. - Sketch the concept
Key question: Which tools are needed, and how do you want to realize the connection?
Here, you identify which external services or systems are involved and outline how they should be connected. - Design the technical realization
Key question: Which OLIVE concepts help in realizing this connectivity?
At this stage, you translate your concept into OLIVE terms, identifying the datapoints, connectors, and other OLIVE components you need. - Realize the connectivity
Key question: How do you use OLIVE technology to implement it?
This is where you actually build the connectivity in OLIVE, configuring datapoints, defining connections, and implementing the designed flow. - Deploy the connectivity
Key question: How is deployment handled?
In this final phase, the solution is deployed into the OLIVE environment, ensuring it is ready for operational use.
Applying the Methodology
By the end of this training, you should be able to answer these five questions yourself for any new connectivity scenario.
For demonstration purposes, and to make the methodology concrete, we will walk through each of these phases using a practical example: automatically generating an ADONIS model from a meeting transcript. This case will guide us step by step through the OLIVE connectivity development process.
Sketch the Idea
The first step in developing connectivity in OLIVE is to clarify what you want to do. A simple and effective way to capture this is by writing a user story.
Example User Story
“As a user, I want to upload a transcript from a videoconference (e.g., MS Teams) in order to automatically generate a model in ADONIS based on the collaborative discussion.”
This story provides a clear, goal-oriented description of the use case and helps frame the connectivity scenario.
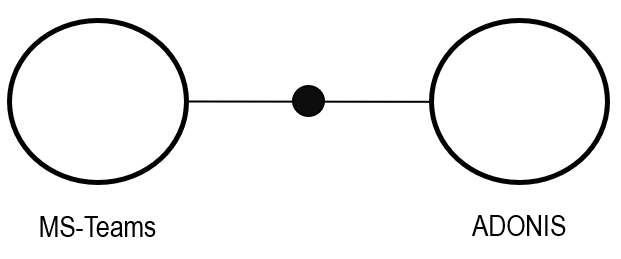
High-Level Connectivity
Once the user story is defined, we can sketch the high-level connectivity:
- On one side, MS Teams provides the transcript.
- On the other side, ADONIS receives the input and generates a model.
- The connection between them represents the flow of data from one service to the other.
Use Case Clarification
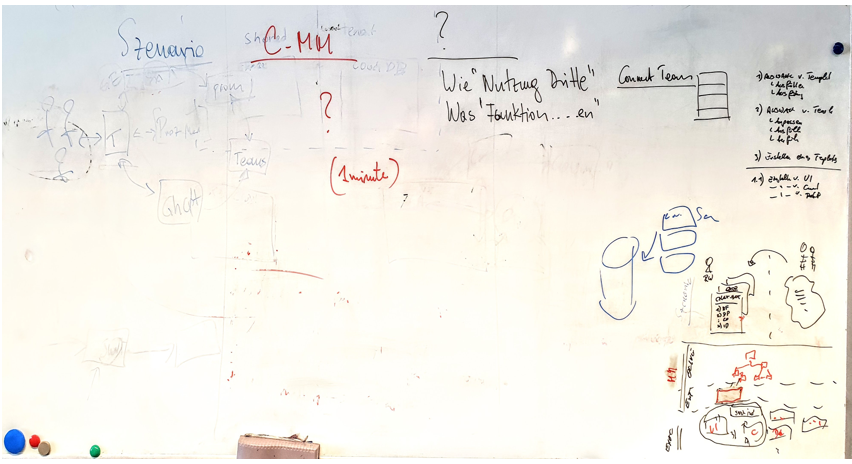
Once the user story is defined, the next step is to clarify the use case. At this stage, we are not yet building anything — instead, we are writing down what we want to achieve, why it matters, and who needs to be involved.
Think of this phase as sketching on a whiteboard: it may look messy, but it is crucial for establishing alignment before any technical work begins.
Use Case Definition
The goal of our example is to automatically generate ADONIS models from meeting transcripts.
Business Requirements
To make this use case meaningful, we identify the following requirements:
- Reduce manual modeling effort that typically follows workshops.
- Ensure consistency in capturing meeting outcomes across different sessions.
Stakeholder Alignment
For this use case to succeed, it is important to align stakeholders early. This includes:
- Business analysts – ensuring business context and outcomes are properly reflected.
- Process owners – validating that models support operational needs.
- IT administrators – ensuring feasibility, security, and integration with existing systems.
At this point, everyone should have a shared understanding of the goal, value, and responsibilities, creating the foundation for the next phase: sketching the concept.
Sketch the Concept
Once the idea is clear, the next step is to sketch the concept by answering the question: Which tools are needed, and how do we want to realize the connection?
At this stage, the goal is to capture the general flow at a high level, without yet diving into APIs or JSON details. This ensures the logic is sound and that all stakeholders share a common understanding of how the systems interact.
In our example, the concept flow looks like this:

- File Upload
A transcript from a videoconference (e.g., MS Teams) is uploaded into the system. - Denoise Content using AI
An AI service (e.g., ChatGPT) is applied to clean the transcript and extract structured process-relevant information. - Create Model in ADONIS
The processed information is imported into ADONIS using its REST API, resulting in an automatically generated process model.
This flow already highlights the tools we need:
- MS Teams for the source transcript
- OpenAI (or another AI service) for cleaning and structuring the content
- ADONIS for creating and storing the final model
At this stage, the focus is on alignment and clarity, not technical implementation.
Clarifying the Interaction: How Should the Action Be Triggered?
Once the general flow is clear, the next step is to think about how users will actually interact with the system. This means answering the question: How should the action be triggered?
Several options are possible:
-
No UI at all
The action could be triggered automatically, for example right after a meeting ends. This removes the need for any user interaction. -
Integration into an existing tool
The action could be triggered from an existing system, such as MS Teams or ADONIS, by clicking a predefined action or button. -
A new dedicated UI
If neither automation nor embedding makes sense, a new user interface can be created. Here, we still need to decide where this UI should live:- Embedded within ADONIS or Teams
- Standalone as a separate application
Decision for This Use Case
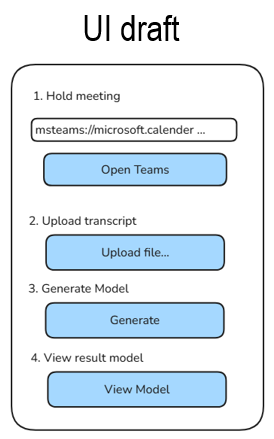
For our scenario, we decided on a standalone application. This provides flexibility and independence from existing tool interfaces, while keeping the user interaction simple and focused.
As part of this decision, we also sketched a UI draft to visualize how the standalone application could look.
Excursion - OLIVE MM
You have already created datapoints and connectors in the Hello World chapter. How to Start - Hello World
This excursion revisits these concepts from a metamodel perspective, showing how the JSON structures you used map to OLIVE’s internal model, before moving on to Phase 3.
More detailed information about the OLIVE Metamodel is available in: Metamodel.

Connectable Element
At the most abstract level, OLIVE defines the Connectable Element.
A connectable element is anything that can be invoked as part of a flow, such as:
- an HTTP call
- a prompt
- an event
- or another connector
All executable elements in OLIVE are based on this concept.
Connector
A Connector is a specialization of a connectable element.
It defines execution order and data flow by orchestrating multiple connectable elements.
In our example: the connector ensures the correct order → File upload → Denoise transcript → Create model.
HTTP Datapoint
An HTTP Datapoint is a specialization of the datapoint concept.
It represents a single HTTP request and is the element that actually interacts with an external system.
In our example: this is where OLIVE connects to APIs such as the ADONIS REST API to create a model.
Design the technical realization
With the overall flow defined, we now move to Phase 3: Design Technical Realization, asking the question:
Which OLIVE concepts help me realize this connectivity?
The image illustrates how the concrete connectivity steps in our use case map onto OLIVE’s metamodel elements.
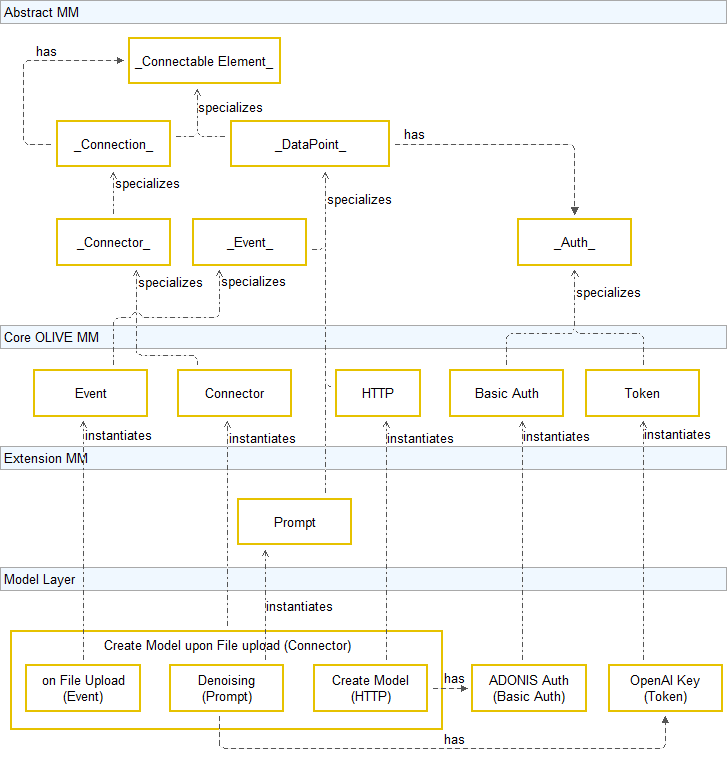
Some of the concepts shown in the figure are used solely to illustrate how the example works and are not intended to be instantiated by connectivity developers. For this reason, not all concept types are explained in detail.
In particular, the Event class shown above belongs to the microfrontend section, which is not part of the functionality provided to connectivity developers in this release. It is included in the figure only to clarify the entry point of the connector within the example.
Connectivity Steps in the Use Case
-
Trigger Event – onFileUpload
- Represents the event that starts the workflow.
- Classified in OLIVE as an Event.
-
Denoise Transcript – Apply AI to clean and structure the transcript
- Realized through a Prompt Datapoint.
- Prompts are extensions to the OLIVE metamodel, enabling use cases such as AI integration. (We’ll explore extensions later in the training.)
-
Create ADONIS Model – Call ADONIS REST API
- Implemented as an HTTP Datapoint.
- Uses ADONIS authentication credentials.
Connecting the Steps with a Connector
- On the right-hand side of the slide, you see how these elements align with OLIVE’s metamodel.
- The Connector orchestrates the sequence:
onFileUpload → Denoise Transcript → Create Model in ADONIS.
Why This Matters
- This mapping connects the JSON structures you created in the hands-on (datapoints, triggers, etc.) with the OLIVE metamodel.
- Understanding this bridge between JSON definitions and OLIVE’s structure is key to designing reusable, structured scenarios.
Realize the connectivity
Having mapped the workflow conceptually, the next step is to implement and deploy it in the OLIVE Connectivity Editor. This combines Phase 4 (Realization) and Phase 5 (Deployment & Testing).
Steps to Build the Connector
-
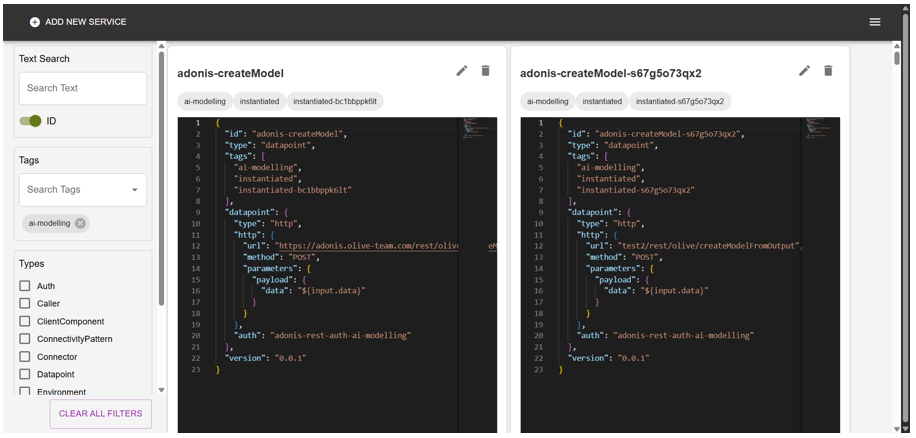
Create and Register Datapoints
- Event Datapoint – file upload trigger.
- Prompt Datapoint – transcript denoising via OpenAI.
- HTTP Datapoint – call to the ADONIS REST API to create a model.
-
Configure Authentication
- Store the required credentials (OpenAI API key, ADONIS login) directly in the Connectivity Editor.
- Ensures secure handling of access information.
-
Assemble into a Connector
- Define the execution order:
File Upload → Denoise Transcript → Create Model in ADONIS. - Reference the previously created datapoints inside the connector definition.
- Define the execution order:
-
Deploy and Test
-
Adding these connectable elements in the Connectivity Editor automatically deploys them.
-
Test by uploading a transcript file:
- Watch the denoising step execute.
- Confirm that a corresponding model is successfully created in ADONIS.
-
This is the moment where the abstract design becomes a working end-to-end workflow, proving the power of OLIVE’s connectivity framework.
Deploy the Connectivity
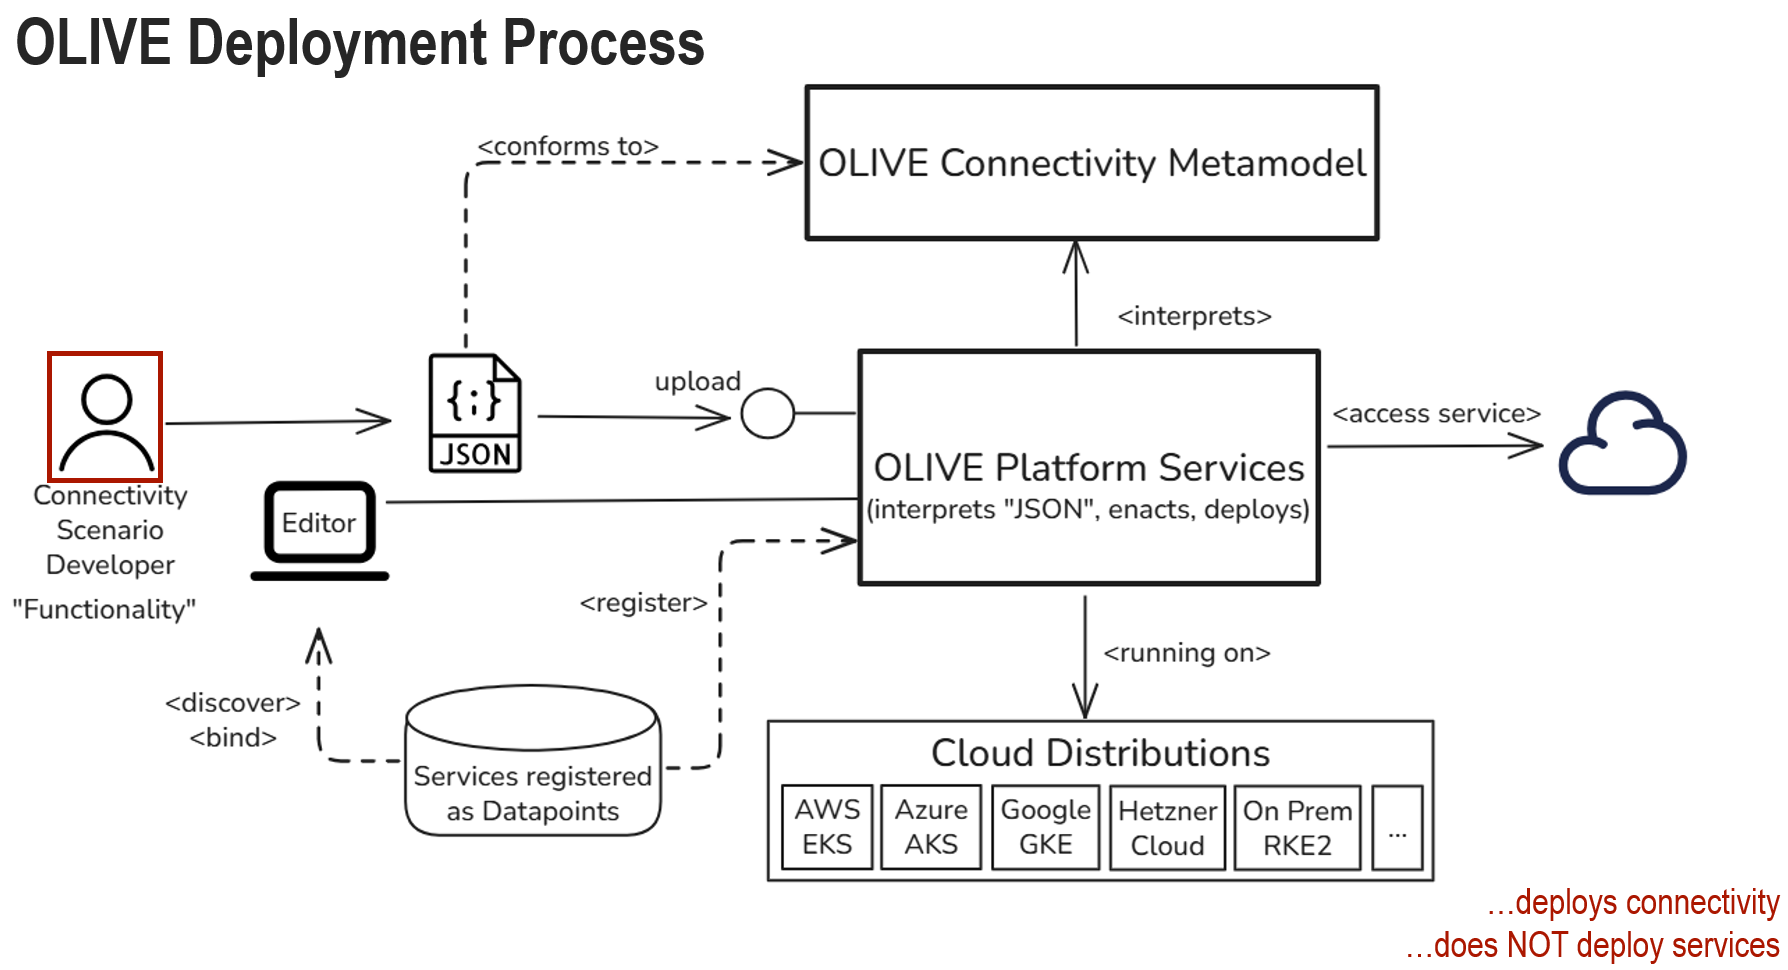
The OLIVE deployment process revolves around transforming connectivity designs into operational scenarios running in the cloud. At the center of this process is the Connectivity Scenario Developer, who is responsible for defining the functionality of a connectivity use case.
Deployment Process Overview
- The Connectivity Scenario Developer creates the design using the OLIVE Connectivity Editor.
- The design is exported as JSON, conforming to the OLIVE Connectivity Metamodel.
- This JSON is uploaded to OLIVE Platform Services, which interprets the model and handles deployment.
- The deployed connectivity scenario runs on cloud distributions (e.g., AWS EKS, Azure AKS, Google GKE, Hetzner Cloud, on-premise RKE2, etc.).
- Services themselves are not deployed by OLIVE — instead, OLIVE deploys the connectivity between them.